Application Settings
Overview
Fitbit developers can make their application configurable by users, by creating an settings definition file which uses the Settings API. Users can configure an application within the Fitbit mobile application on their phone, and the settings can be sent to the Fitbit device using a Companion and Messaging.
Application settings are written using React JSX syntax, compiled, then installed into the Fitbit mobile application during the application installation process.
How It Works
When a user changes configurable settings for an application, the values for
each setting are persisted into
settingsStorage on the mobile device.
The companion can either listen for a change event to determine which
key/value has changed, or each key/value pair can be manually iterated on
demand, or when the companion is started with
launchReasons.settingsChanged
If required, the settings values can be passed from the companion to the device using the Messaging API.
Persistence
Although settings are persisted into settingsStorage on the mobile phone, it
is the developer's responsibility to persist their settings on the connected
device (if they so desire). This is the preferred approach from a useability
perspective. You can see an example of this within the
SDK Moment clock face.
Settings Definition
The settings definition file (/settings/index.jsx) can contain any of the
following predefined JSX components:
- Link
- Text
- TextImageRow
- Button
- Toggle
- ColorSelect
- Select
- Additive List
- Section
- List
- Slider
Multiple components are combined into a single file to produce a settings page.
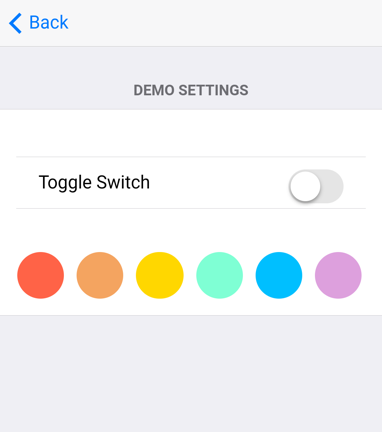
The following definition will create a toggle button and a color picker:
function HelloWorld(props) {
  return (
    <Page>
      <Section
        title={<Text bold align="center">Demo Settings</Text>}>
        <Toggle
          settingsKey="toggle"
          label="Toggle Switch"
        />
        <ColorSelect
          settingsKey="color"
          colors={[
            {color: 'tomato'},
            {color: 'sandybrown'},
            {color: 'gold'},
            {color: 'aquamarine'},
            {color: 'deepskyblue'},
            {color: 'plum'}
          ]}
        />
      </Section>
    </Page>
  );
}

registerSettingsPage(HelloWorld);

App Settings
When a user configures an application, the changed settings need to be updated using the Companion, which (if required) can send the settings values to the App via Messaging.
By default, setting values are automatically persisted within
settingsStorage which uses
LiveStorage to emit an
event that the Companion can consume.
Get Settings
Setting values can be retrieved using their key:
import { settingsStorage } from "settings";

// Get the value of the setting
let myKeyValue = settingsStorage.getItem("myKey");
Or they can be retrieved by their index:
import { settingsStorage } from "settings";

// Get the name of the first setting
let myKeyName = settingsStorage.key(0);

// Get the value of the first setting
let myKeyValue = settingsStorage.getItem(0);
Remove Settings
Setting values can be removed using their key:
import { settingsStorage } from "settings";

// Remove a setting from storage
settingsStorage.removeItem("myKey");
Clear Settings
If you need to remove all entries from settingsStorage you can use:
import { settingsStorage } from "settings";

// Clear all settings
settingsStorage.clear()
Handling Settings Changes
A user may change the settings of their application at any time, even if the application is not currently running. It's important for developers to handle situations where settings are changed in the following two ways:
Settings Change Event
The change event is automatically emitted when the user changes as setting,
and the companion is currently running.
import { settingsStorage } from "settings";

// Event fires when a setting is changed
settingsStorage.addEventListener("change", (evt) => {
  // Which setting changed
  console.log(`key: ${evt.key}`)

  // What was the old value
  console.log(`old value: ${evt.oldValue}`)

  // What is the new value
  console.log(`new value: ${evt.newValue}`)
});
Settings Changed Launch Reason
If the user changes application settings whilst the companion is not currently
running, the companion will be automatically launched and the launchReason
will be set to settingsChanged.
import { me as companion} from "companion";

if (companion.launchReasons.settingsChanged) {
  // Settings were changed while the companion was not running
}
Settings in Action
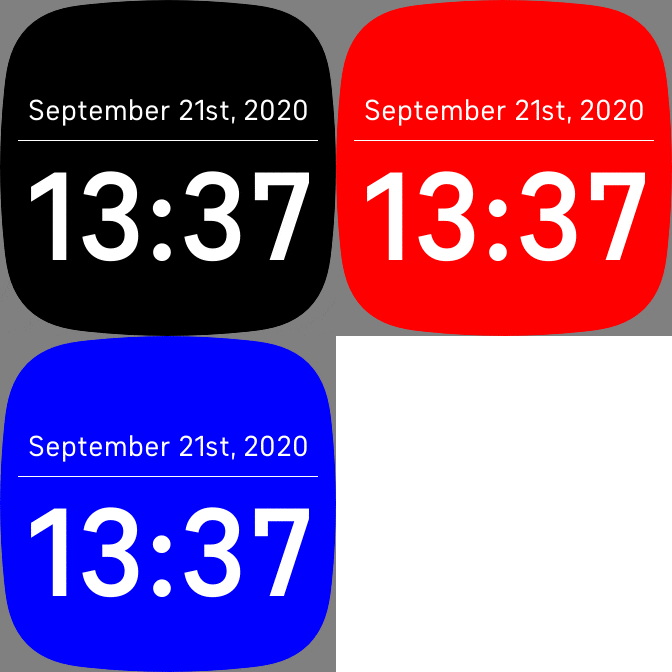
In the following example we will create an app which can receive color settings from a settings page using Messaging. When the user changes the setting, the new color value will be passed via the companion to the device and change the display color.
Settings Definition
A basic definition of a color picker. The settings key is named myColor, and
contains a list of named colors.
function Colors(props) {
  return (
    <Page>
      <Section
        title={<Text bold align="center">Color Settings</Text>}>
        <ColorSelect
          settingsKey="myColor"
          colors={[
            {color: 'tomato'},
            {color: 'sandybrown'},
            {color: 'gold'},
            {color: 'aquamarine'},
            {color: 'deepskyblue'},
            {color: 'plum'}
          ]}
        />
      </Section>
    </Page>
  );
}

registerSettingsPage(Colors);
Companion
The companion listens for the change event, and checks to see if settings were
changed while it was not running, then sends the settings data via
Messaging to the app.
import { settingsStorage } from "settings";
import * as messaging from "messaging";
import { me as companion } from "companion";

let KEY_COLOR = "myColor";

// Settings have been changed
settingsStorage.addEventListener("change", (evt) => {
  sendValue(evt.key, evt.newValue);
});

// Settings were changed while the companion was not running
if (companion.launchReasons.settingsChanged) {
  // Send the value of the setting
  sendValue(KEY_COLOR, settingsStorage.getItem(KEY_COLOR));
}

function sendValue(key, val) {
  if (val) {
    sendSettingData({
      key: key,
      value: JSON.parse(val)
    });
  }
}
function sendSettingData(data) {
  // If we have a MessageSocket, send the data to the device
  if (messaging.peerSocket.readyState === messaging.peerSocket.OPEN) {
    messaging.peerSocket.send(data);
  } else {
    console.log("No peerSocket connection");
  }
}
App
For our app, we will change the color of a <rect> element.
<svg>
  <rect id="myElement" width="100%" height="100%" x="0" y="0" fill="black" />
</svg>
Next we will listen for the message event, then set the fill color of our
<rect>.
import * as messaging from "messaging";
import * as document from "document";

let myElement = document.getElementById("myElement");

messaging.peerSocket.addEventListener("message", (evt) => {
  if (evt && evt.data && evt.data.key === "myColor") {
    myElement.style.fill = evt.data.value;
  }
});


